Welcome to Channels application!
After creating an account, it's time to name it!
You will be able be welcomed by a window where you can give your new Channels account a name. What's more, you will be asked to add your website and business contact phone number.
Once you go through this process, you are only a few steps away from the first call and contact with your customers!
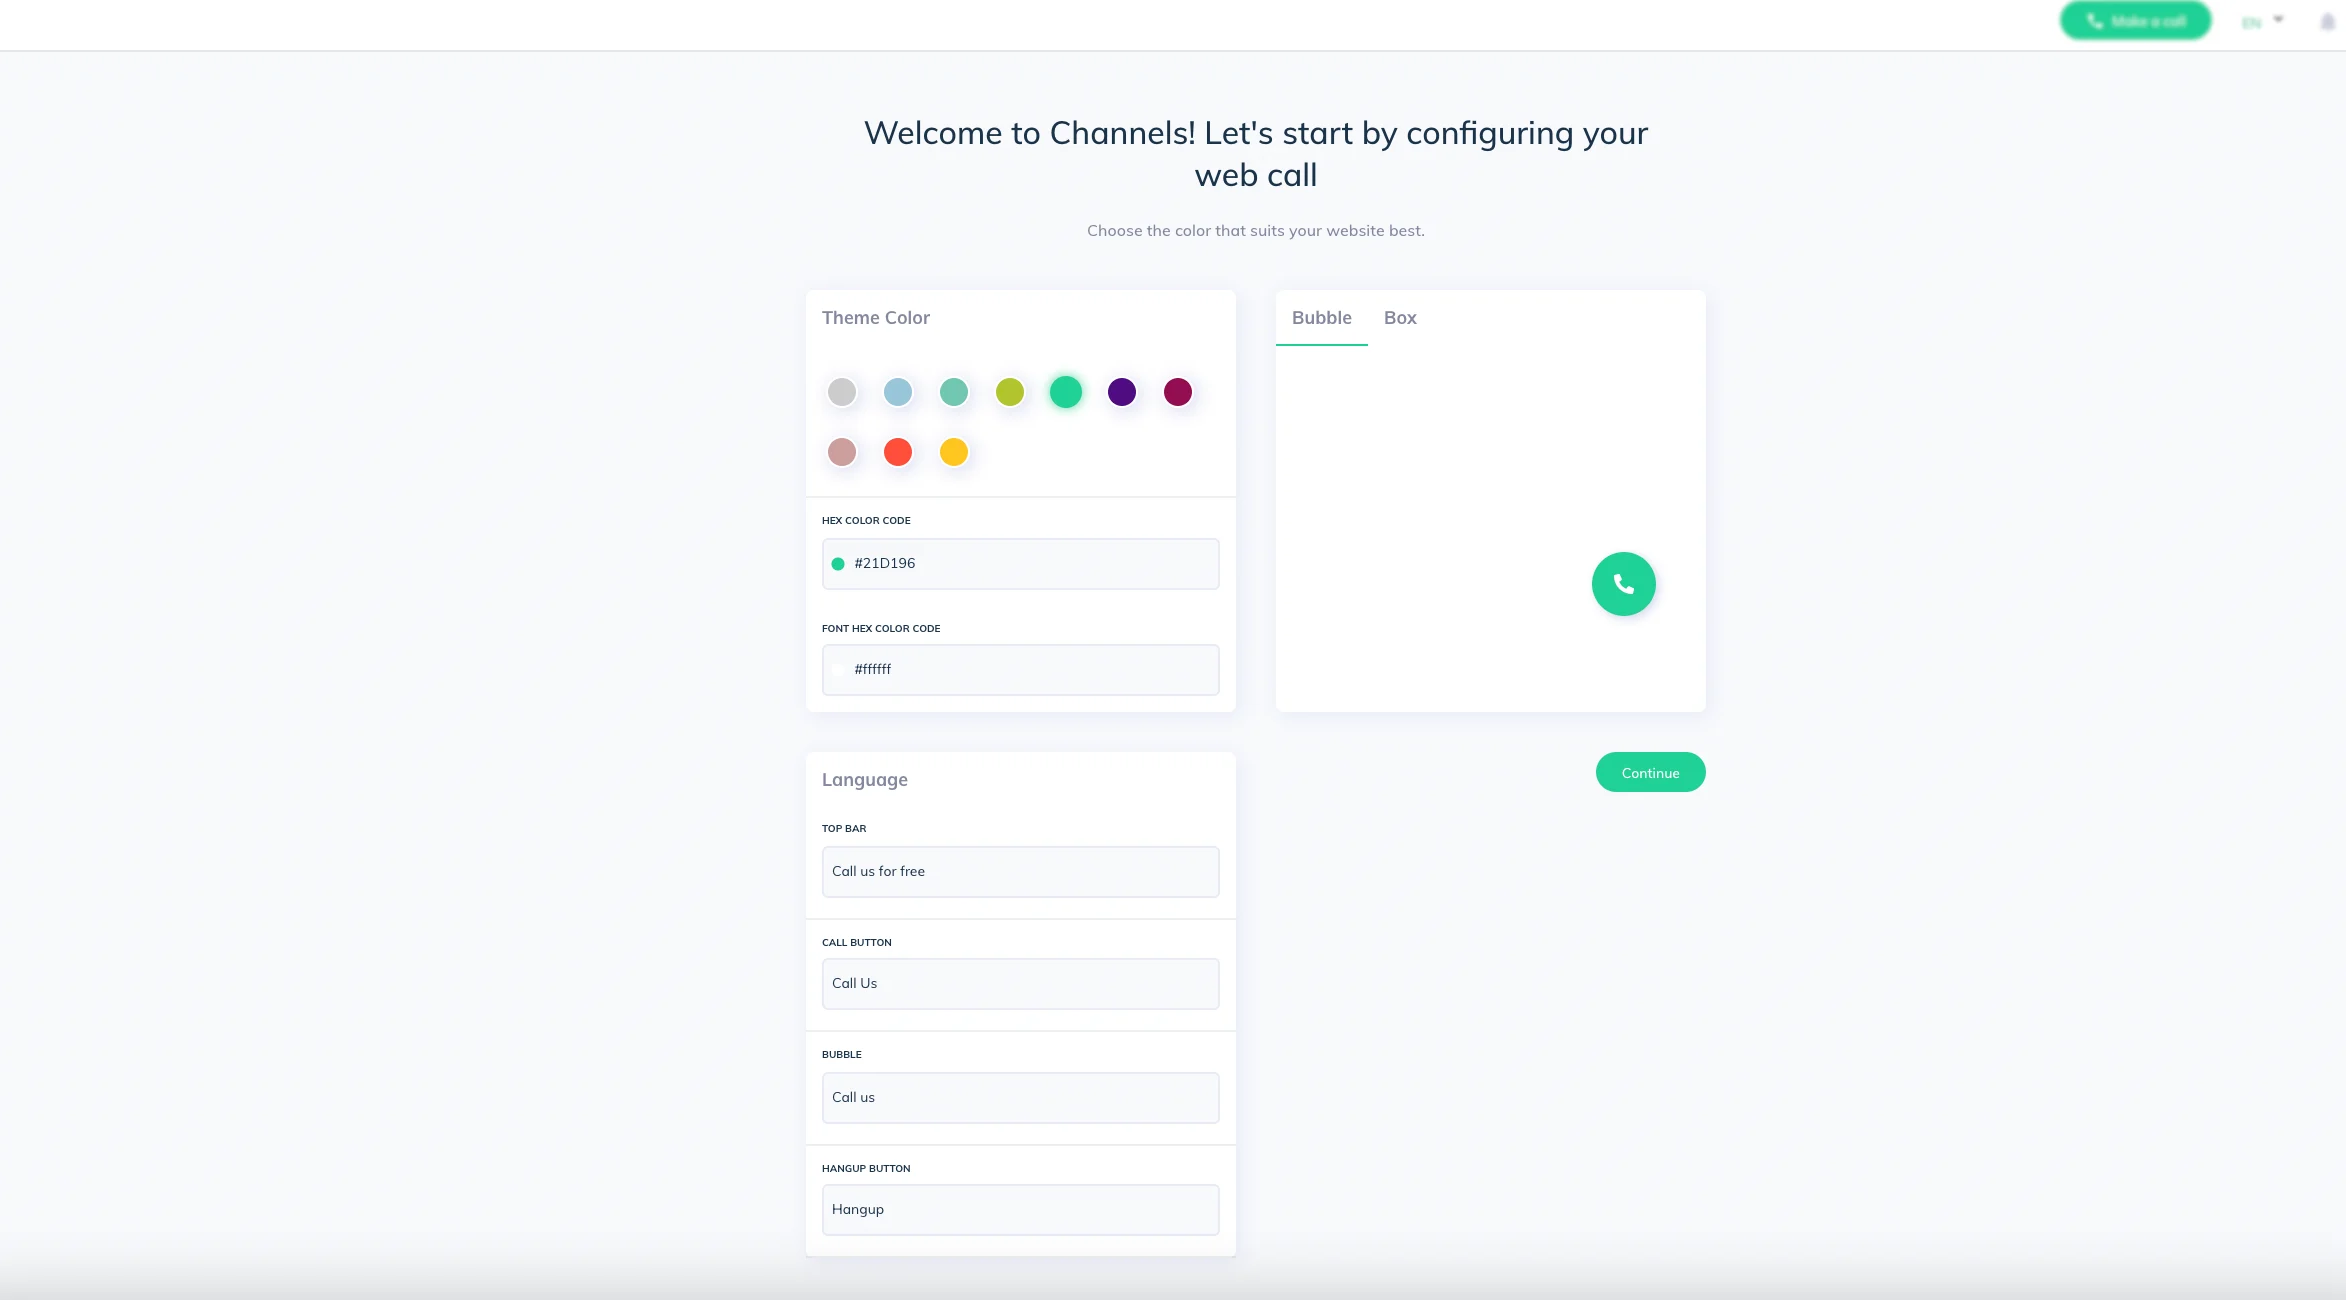
Let's start by configuring your Web Call!
You can configure it however you fancy! Colors, texts, position on your website.
It's not difficult at all! Follow our step by step guide to proceed to the installation process.
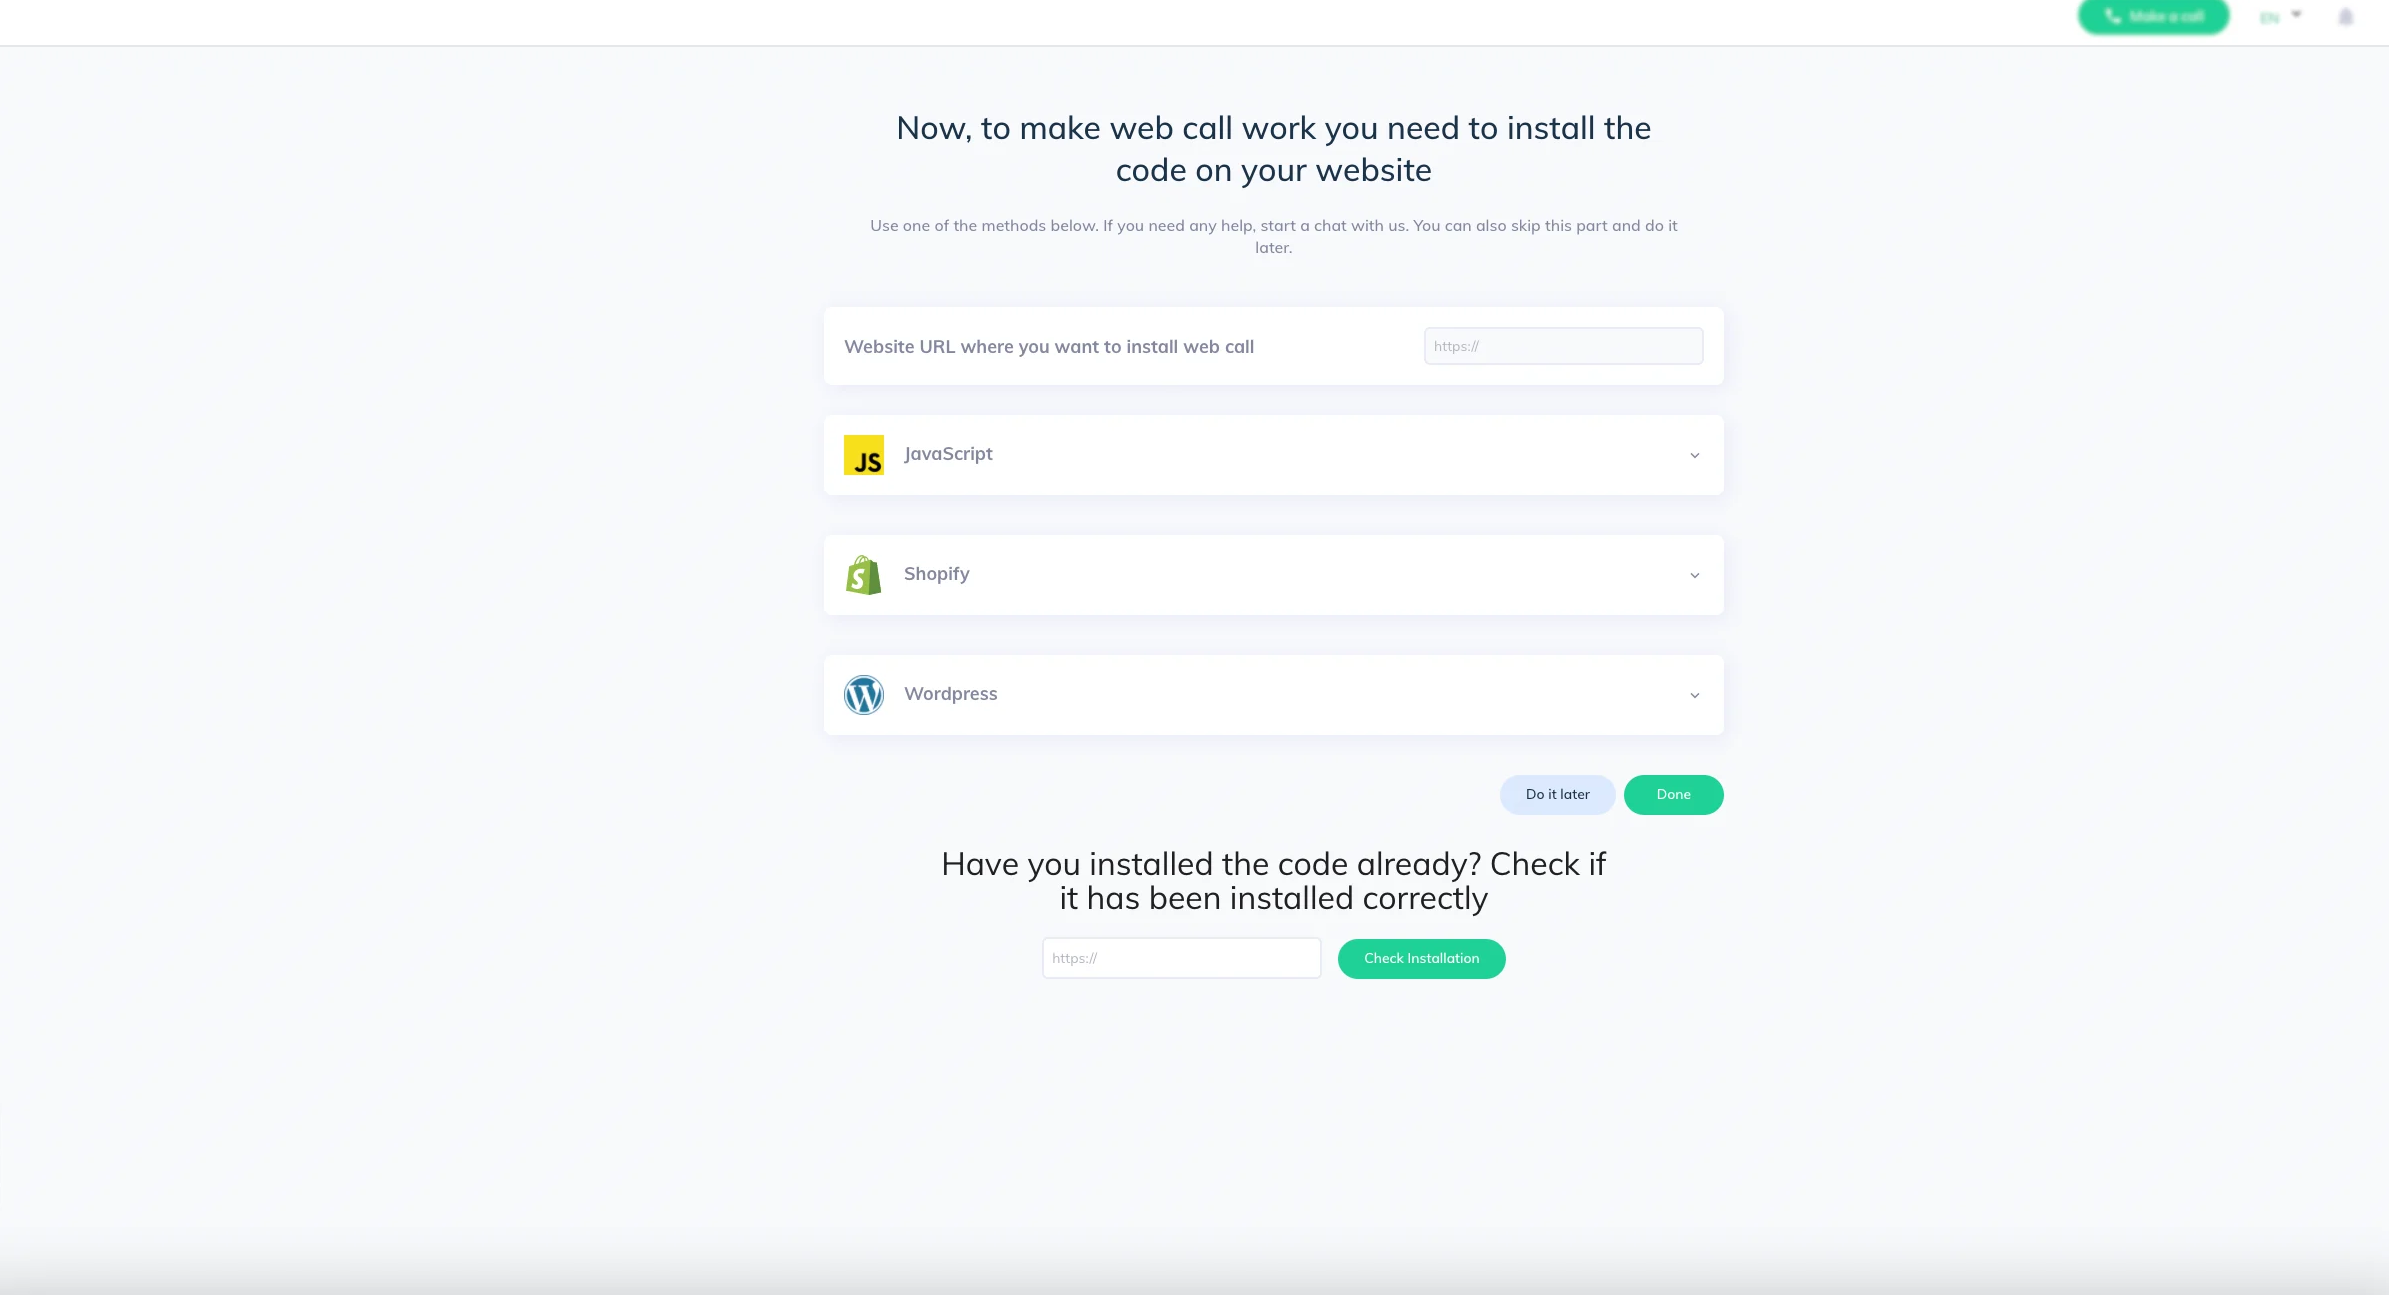
There are four different options to choose from for the placement of your Web Call:
Website URL - Inserting URL of the website you want the Web Call widget to be displayed.

JavaScript - The code that allows you to paste Web Call by yourself.
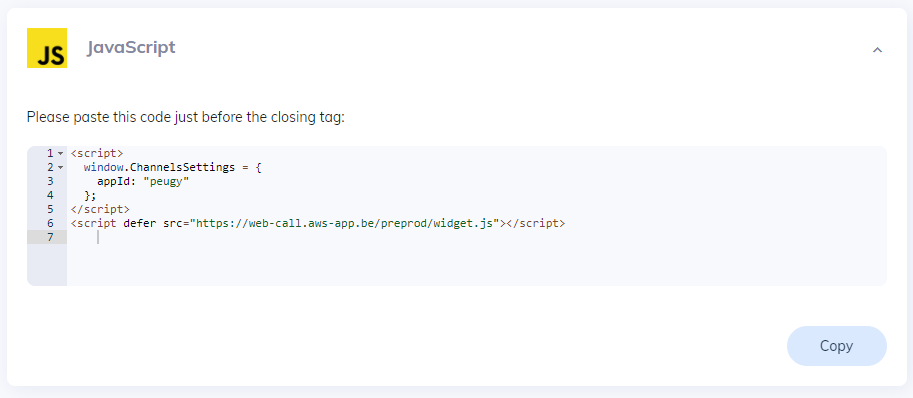
Note that each code is unique. To work, it must be copied exactly from the website.
Shopify - Follow these three steps:
Log in to your Shopify admin panel.
Go to Online Store > Themes > Actions (under Current Theme) > Edit code > theme.liquid.
Paste the code just before the tag at the end of theme.liquid.
WordPress - Follow these five steps:
Log in to your WordPress admin panel.
Go to Appearance > Theme Editor.
Under Theme Files, select Theme Footer (footer.php).
Paste the code before the tag at the bottom of the file.
Click Update File to save your changes.
If you don’t want to decide now, you can return later to the Web Call configuration.
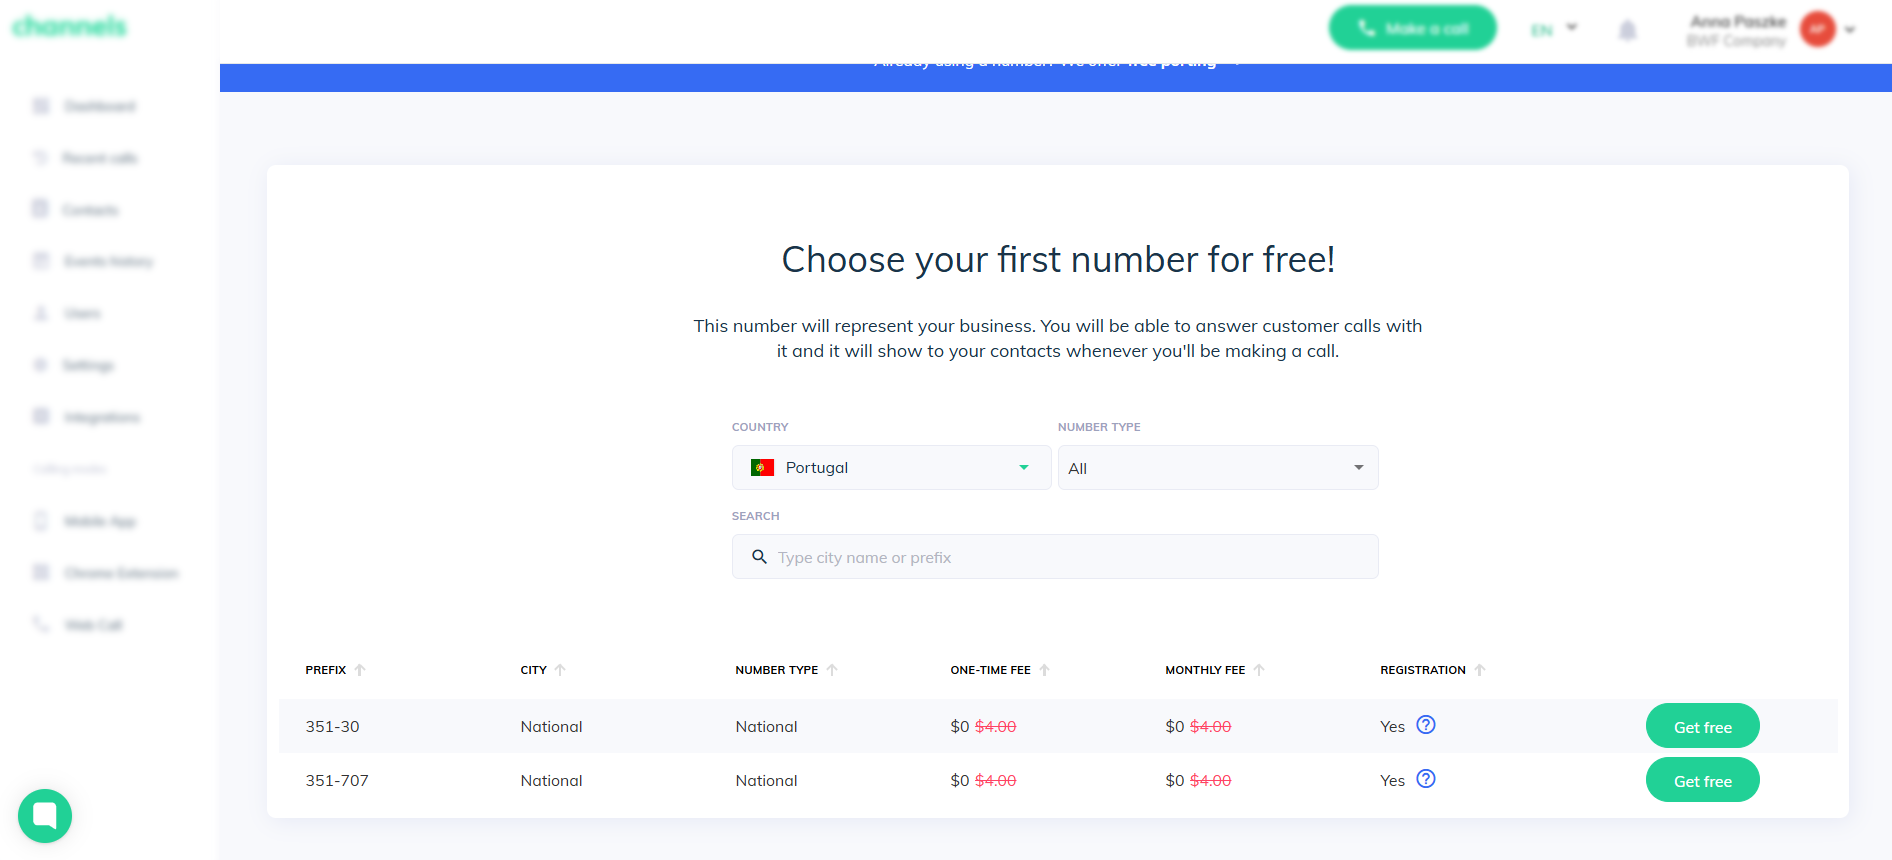
The last step is to choose the number you'll present when using our app.
You can pick the country, prefix, and exact number, then give it a label. It’s that simple.
Once you finish that, you will be redirected to the screen that will confirm that the account setup process is complete. From now on, you will be able to use our application to connect with your customers, easier than ever!
